Wednesday, 19 February 2020

EDITORIAL: Curbing of supermarkets a welcome move!

Shoprite, which acquired Computicket from Naspers in 2005, should pay 10% of its turnover as a fine, the Competition Commission said last Thursday. Picture: JEREMY GLYN
The Competition Commission took a long time to wrap up its investigation into anti-competitive practices in the grocery retail market.
But its recommendation in the 650-page report that mall owners and supermarket chains should immediately phase out exclusive lease arrangements is most welcome.
For years SA’s biggest grocery retailers have downplayed the inherently anti-competitive and damaging nature of exclusive lease agreements, which essentially means they call the shots on who can rent out space in a shopping mall.
To the likes of Shoprite, Checkers, Pick n Pay and Spar it is simple:  they have the prestige and name recognition to attract a broad cross-section of the shopping public, benefiting smaller less well-known stores and making the center itself commercially viable. So, they argue, they have to be compensated with arrangements that prevent other competing retail chains from opening outlets in the same mall. For good measure, lenders will be reluctant anyway to fund a shopping mall development if a tenant with such broad appeal is not tied down with a lease lasting at least the duration of the loan.
However, the Competition Commission’s painstaking research and extensive consultation over the last four years have shot massive holes in these lines of argument. 
It would be irresponsible for a supermarket chain to sign a long-term lease without having invested a fair amount in research to work out if the area had enough disposable income to support its outlet. In addition, they further reduce the risk of losing money by negotiating lower rentals.   
Property developers do not build shopping malls blind to the economic prospects of the region or town.  Granted, it is not unreasonable to surmise that their chances of securing a bank loan will be greatly enhanced if they have an anchor tenant firmly in place. But it’s only part of a range of risk assessment processes to realistically assess the ability of a developer to pay back the loan.  
In a sense, as the Commission rightly points out, big grocery chains are transferring the risk of opening new stores to property developers and smaller retailers within a mall as the landlord squeezes less well-known stores for higher rents to cover the cost of granting a rental discount to the anchor tenant.
Given that most consumers do their shopping at malls, emerging challenger chains such as Choppies, Botswana’s biggest grocery chain in the middle of exiting SA, OBC and Fruit & Veg City are competing from the sidelines, and the consumer is robbed of a wide variety of choice.
If anyone has learned the harsh lesson of trying to expand their food offering in  SA shopping malls, it is Massmart, the struggling retailer in which the world’s biggest retailer, Wal-Mart, bought a controlling stake eight years ago.
When shareholders fretted about how much their grocery chains stood to lose from Wal-Mart, which is renowned for budget-friendly prices, their executives were probably losing sleep over a lot of things. But Wal-Mart was not one of them. Massmart has struggled to roll out groceries to take on the industry leaders, leaving it as a predominantly electronics store chain despite setting out a price and margin strategy to lure customers to its stores. It couldn’t crack it from its several Makro stores, which are located outside major shopping centers and attract consumers who are primarily looking for big-ticket items such as televisions, fridges, and lawnmowers. The truth is supermarket chains wield substantial influence: shopping center development plans can be held up until they have their way and a landlord needs their say-so before renting out space. 
While that dominance has created world-class grocery chains, it has excluded widespread participation in the retail sector and undermined the broader national goal of facilitating transformation and economic inclusion.  
The investigation has been a long time coming.  As property developers have an opportunity to voluntarily rein in the influence of grocery retailers, we move to the next inevitable step: make the exclusive mall leases practice illegal. 

Thursday, 13 February 2020

How To Build A PANDORA Bracelet!

1. Determine Your Pandora Bracelet Size
How To Measure your wrist at the largest point. Add at least 3/4 inch but not more than 1 inch to your measurement. For example: If your wrist measures 6 1/4 inches at its largest point, you want to select a 7.1-inch bracelet. Pandora bracelets are offered in the following sizes: 6.3, 6.7, 7.1, 7.5, 7.9, 8.3, 9.1 inches. Our most popular bracelet size is 7.5 inches.
2. Pick Your Pandora Bracelet Type


Pandora Jewelry makes 6 different bracelet types. 3 sterling silver bracelets, 2 oxidized silver bracelets, and one 14Kt gold bracelet. Most bracelets feature a Pandora Snap clasp in sterling silver or 14Kt gold. A lobster clasp is available with the sterling silver bracelet. Our most popular bracelet is the sterling silver with Pandora Snap clasp.

3. Choose Your Pandora Charms/Beads, Spacer, Clips and Safety Chain


The strength of the Pandora bracelet is the unique patented threaded system. Each bracelet is divided into three sections by small threads.


Each Pandora charm/bead is equipped with interior threads, which allows you to screw individual charms onto any bracelet segment in the order you desire. The charms move freely and rotate slightly with your wrist's movement, creating an undeniable eye-catching and stunning effect. Pandora features sterling silver, 14Kt gold, and Murano glass charms. Some sterling silver and 14Kt gold charms are set with gems.

Finish off your Pandora bracelet with matching clips, spacers and a safety chain. Pandora bracelets look best with two matching clips to cover the threaded dividers. Many Pandora bracelet owners prefer to accentuate their bracelets with matching spacers and a safety chain.

Friday, 7 February 2020

10 Essential Dishes You Have to Try in New Zealand!

Pavlova | © William Brawley/Flickr
When in New Zealand, eat as the Kiwis do. Travelers should definitely try to get their hands on some of the country’s quintessential dishes – from seafood to dessert and everything in between. If you’re not sure where to begin, here are a few local staples to add to your taste list.

A New Zealand pie

New Zealanders take their pies very seriously. There’s even an annual competition to find the very best in the country. The more traditional flavours include mince, steak and cheese, bacon and egg, and potato top. That being said, all gourmet pies from cafés and bakeries are worth trying – you might even find vegetarian and vegan options in some places.

The original flat white

Kiwi ingenuity brought the flat white to the coffee guzzling world. Make sure to visit your nearby café to get a taste of the real thing – it’ll be much better than the Starbucks version. Wellington punches well above its weight when it comes to coffee, and Auckland will give you your fill of great cafés too. But really, any local coffee shop will have trained their baristas to froth and brew everything to perfection.

Fish and chips

If you’re around for the summer, head to the local chipper to buy some fish and chips. Then sit by the beach, and revel in a seafood-filled picnic. Common fish options include snapper, tarakihi, and koi. You can usually order one scoop of normal potato chips or kumara (sweet potato) fries. Fish and chip shops will sell more than just those two must-try staples – you could also opt to buy some mussels, oysters, scallops, squid rings, and whitebait fritters.

Pavlova

Ownership disputes aside, the pavlova has got to be New Zealand’s best-renowned dish. It’s a prominent component of various Christmas feasts, dinner parties, and summer barbecues. Pavlovas are meringue-type desserts that are topped with whipped cream and fresh fruit – usually kiwifruit, but sometimes berries or strawberries might be used instead.


Hokey Pokey ice cream

Probably New Zealand’s best contribution to the ice cream industry. Hokey Pokey is a creamy vanilla ice cream with honeycomb toffee pieces. It’s also one of the most popular flavors around – in fact, its primary manufacturer, Tip Top, has won the New Zealand Ice Cream’s Supreme Award for two years in a row because of this icy delicacy.

Cheese and wine
Wine and cheese tasting tours are very much part of the New Zealand travel experience. The best cheese manufacturers can be found in Kapiti, Whitestone, and Puhoi Valley. Local wineries offer a variety of sauvignon, pinot noir and merlot options for keen connoisseurs novice tasters.


New Zealand lollies

By ‘lollies’, we mean sweets and candies. Popular confectionery items include Pineapple Lumps (pineapple candy with a chocolate coating), Chocolate Fish (which has marshmallow inside), jaffas (a hard, orange candy), jelly jet planes and gummy snakes. You can usually get these in supermarkets or at a local dairy (i.e. a corner store).

Slices and squares

You’ll find lots of different variations of these at local cafes and bakeries. Caramel slices, custard slices, rocky road slices, and lolly cakes are some of the most common of these delectable Kiwi indulgences. They’re perfect for a mid-morning treat or as a quick dessert on the go – and they’re even better with a fresh cup of coffee.

New Zealand lamb

New Zealand is world-famous for its beef and lamb industry. So it’s only fair that we include it as one of our must-taste dishes. Lamb is traditionally flavored with rosemary and is served with steamed vegetables on the side. Whether you like your meat roasted or grilled, you’ll find that most restaurants will have this quintessential item on their menus.

A hangi

The hangi has been around for more than 2000 years and was a popular cooking method for Maori. Various foods like chicken, pork, mutton, and vegetables are roasted on a closed fire underground. These days, hangis are saved for special occasions – but tourists can get a taste of this traditional dish in selected heritage sites around the Bay of Plenty.

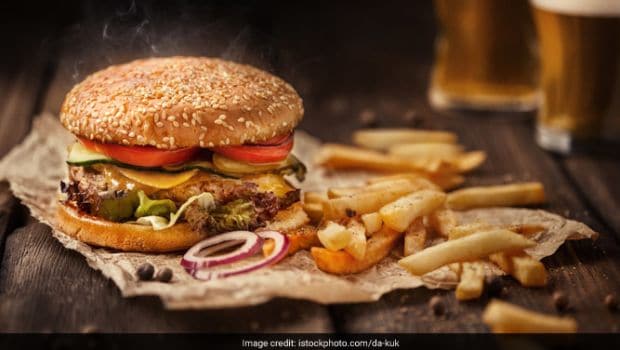
A Complete Guide To Making Perfect Burgers At Home

There's something vividly satisfying about taking a bite of the moist meat, the salty cheese, the soft white bun, and the crisp-as-a-wafer lettuce leaf of a burger. Here's how to make the perfect one at home!

A Complete Guide To Making Perfect Burgers At Home

When it comes to burgers, the world's your oyster; that's why you can make anything, from avocado and bacon burgers to potato tikki burgers. No matter which burger floats your boat though, there's something vividly satisfying about taking a bite of the moist meat, the salty cheese, the soft white bun, and the crisp-as-a-wafer lettuce leaf. One of North America's most famous exports to the world, its very first mention appeared on a Delmonico's menu in 1834, in New York. This wasn't quite the burger we know today, but something quite similar. It's a little hard to trace, but the rise of the burger appears to have happened simultaneously with the rise of the car-after all, the burger is quite easy to carry in one hand, while the other can stay on the wheel.
I'd like to preface this piece by noting that you can have your burgers any way you like. The burger is a blank canvas, for you to paint according to your likes and dislikes. Don't let anyone suggest that their way is the only way!
burger
Burger Patty
The burger patty is of course a crucial part of a burger. The classic American patty is made from beef, preferably ground fresh at home, then gently patted into shape and cooked. Just make sure to season it before serving, not before cooking, as the salt will leech the moisture from the meat, making it dry and inedible. But there are so many other options too; exceptional vegetable burgers, lamb or chicken burgers and of course, there's nothing quite like a crisp fish burger.
Burger Cheese

Cheese is an integral part of a burger. You are free to choose any cheese you like- a brie, for instance, would add creaminess to your burger, and goat's cheese would bring in a tang. Just make sure to pick a soft-ish cheese so that it can melt fully.
Burger Buns

I find the best burger buns are the classic pillowy burger buns; sometimes pocked with sesame seeds, sometimes not. Any other bun becomes almost too flavoursome, and takes away from the taste of the burger meat. Plus, it veers too much into sandwich territory!

Burger Condiments

When it comes to burger condiments, I'm a purist-I like pickles maybe, or caramelised onions. No tomatoes, because they make the burger bun too messy for me. But then again, my best friend always has bacon and a fried egg, and my mum goes for lettuce and tomato. There's no hard and fast rule!

Burger Sauces

A slew of sauces are available to us to slather over the burger bun-sweet ketchup, mayonnaise, smoky barbecue, special sauce (a blend of ketchup and mayonnaise), chilli sauce. It's one of the quickest ways to add flavour to your burger.

how to make burger

Constructing Your Burger

Reams and reams of text have been dedicated to the perfect architecture of a burger. There's a reason for this; lettuce is liable to wilt straightaway, tomato may drip all over the bread making it soggy, your condiments may all fall out the minute you bite into your burger. All this can be avoided by proper layering. Always start with a lightly grilled bun that has been smeared with mayo (or special sauce or whatever condiment). This will ensure that your veggies don't slide off. Then place your pickles (if using) on the bottom slice of bread, followed by your patty. Above the patty goes your melted cheese, then tomato, then your leaf of crisp lettuce, and finally your top bun, and you're all set!

Recipe For Chicken Burger Patty

Ingredients:

Milk - 50g

Breadcrumbs - 30g

Chicken, ground - 750g

Butter - 3 tbsp, melted until just malleable

Salt and pepper to season

Method:

1. Mix together the chicken, butter, milk and crumbs into a large bowl. It's preferable to use your hands for this, and to fiddle as little as possible with the meat.

2. Chill the mixture for about half an hour; this will help your patties to hold their shape. Then take them out of the chiller, and shape into four patties, as quickly as possible.

3. Cook them on a skillet with hot oil, turning every three minutes or so until they are cooked through. They are now ready to go on your burger buns.

Recipe For Veggie Burger Patty

meatless burgerAlways start constructing your burger with a lightly grilled bun

Ingredients:
Yellow onion - 1/2, medium sized

Raw beetroot - 1/2 cup, peeled and grated

Garlic cloves - 6, peeled and crushed

Lemon juice - 1/2 tbsp

Pumpkin seeds - 1/4 cup, toasted

Almonds - 1/2 cup, chopped

Chilli powder - 2 tsp

Black pepper powder - 2 tsp

Salt to taste

Rice - 2 cups cooked (these should be short grained rice)

Egg - 1

Oil to fry

Method:

1. Chop up the onion and sauté over a medium flame until it softens and caramelises. It will take about fifteen minutes. Add in the beets, almonds, garlic, chilli powder and pepper, and stir frequently, for about ten minutes.

2. Allow the mixture to cool. Now grind in a mixer with the lemon juice and seeds, until the consistency is chunky. Don't process it so much that the texture is lost. Empty the mixture out, then in the same mixer, blend together the egg and rice till a paste-like consistency is attained. Then mix everything in a large bowl, together with the onions.

3. Set aside to chill for half an hour. This will allow the patty mixture to firm up. Shape them lightly into four-five patties, and then cook them over a well-oiled skillet for about ten minutes, turning once. Once they have grown crusts on both sides, take them off the flame, slide into your burger buns and enjoy.
So the next time you think of making burgers at home, bring this handy guide to your rescue and get going!

Thursday, 6 February 2020

Homemade Baby Balm Skin Cream Recipe!

When I was pregnant with my first child, I was given literally 11 bottles of baby lotion by friends and relatives. The smell reminded me of my own childhood and I loved that it was a lotion specially formulated for baby. I figured all of the ingredients must be natural and safe since it was for babies after all… and then I actually read the ingredients.

What’s in Baby Lotion?

I wondered why things like propylene glycol, parabens, artificial fragrances, synthetic waxes, and petroleum-based oils were considered safe for children. Turns out, they aren’t considered safe for children and the products I’d been given had a hazard rating of 5-6 on the EWG website and had “moderate risk of allergies and immunotoxicity as well as reproductive and developmental toxins.
I definitely wasn’t going to put that on my baby, so I started looking for natural options. I found some great ones but also found out that most of them were pretty expensive.

Baby Balm Skin Cream RecipeI decided to try to make my own from all-natural, food-safe ingredients and this ended up being less expensive for me anyway since I had many of these ingredients on hand for my homemade lotion bars and other homemade beauty products.

Choosing Natural Ingredients

Instead of propylene glycol, parabens and synthetic ingredients, I wanted to find all-natural ingredients to put on my baby’s skin and I wanted them to even be safe enough to eat!
I decided to use:
  • Cocoa Butter because it is naturally high in antioxidants and fatty acids that are moisturizing to the skin. (I ordered it here)
  • Shea Butter – Natural source of Vitamin A and other nutrients, shea butter is highly nourishing to the skin. (I used this raw, unrefined one)
  • Olive Oil– Moisturizing and skin protecting.
  • Castor Oil– Optional but high in ricinoleic acid and skin protective. (this is the one I use)
  • Essential Oils: I used Frankincense, Myrhh, Chamomile, and Rose and the scent was incredible. The Chamomile I used was blue chamomile, thus the blue/green tint in the picture above.
I loved that this recipe is completely oil-based with shelf-stable ingredients. Since no liquid is added, it has an indefinite shelf life and will last for months or years. It takes a few minutes to absorb into the skin and only a tiny bit is needed. I’ve had friends say that this was incredibly helpful for eczema and skin problems as well.

Baby Balm Ingredients

  • 1/4 cup cocoa butter (or 32 cocoa butter wafers)
  • 1/4 cup shea butter
  • 2 Tablespoons olive oil
  • 1 Tablespoon castor oil
  • Essential oils of choice. I used 15 drops each of Frankincense, Myrrh, Chamomile, and Rose.

Baby Balm Instructions

  1. Heat all ingredients (except essential oils) in a double boiler or in a glass jar or bowl over a small pan of boiling water.
  2. Stir carefully until melted.
  3. Remove from heat and add essential oils if using.
  4. Pour in to a glass jar for storage.
  5. Use a small amount as needed for baby’s skin (or adult skin)
What did you use on your little ones? Ever made your own? Share below!
This natural homemade baby balm combines skin nourishing cocoa butter, shea butter, olive oil and castor oil with essential oils for a baby safe lotion.

Wednesday, 5 February 2020

roasted stuffed bell peppers!


After Day One at the wineries and Days Two and Three at the grill, we spent our last day on a barely too brief to mention swing into San Francisco where we wandered the Ferry Market Building and lunched at the Slanted Door with friends before heading up to Berkeley. We had dinner with a gorgeous group of food bloggers that evening at Oliveto in Oakland, and on recommendation from the lovely Shuna, breakfast at Mama’s Royal the next morning. In between these gullet-gutting excursions, we found some time on Monday to wander about the Berkeley campus where we wallowed in nostalgia for our unscheduled college days and once wrinkle-free foreheads (fine, that was just me) before jetting back to the land of late dinners, humidity, and the daily grind.
But really–let’s cut to the chase already, shall we? After raking through my extensive notes from the weekend’s grilling class, it’s even clearer than before what a Grilling 101 it was, chock full of building blocks. The recipes, though, were anything but introductory and I’ve included one of my favorites at the end.
So, with little further ado, five totally nerdy bits of grilling information I learned this weekend:
1. Do you know why gas grills don’t sear as well as charcoal grills? To get a good sear, you need a raging hot fire and a dry surface. Charcoal burns drier than gas. Gas is about 30 percent moisture, releasing 1/2 to 1 cup water every 10 minutes that the grill is on. This water adds steam to the cooking process.
2. There are five ways only to cook with fire: Right in the fire, right near the fire (like toasting a marshmallow), directly over the fire, indirectly, with no heat directly underneath, and an oven set-up, where the walls are heated. [See Figure 1, brought to you by a one-hour delayed flight.] Indirect was totally new to me because I’m obviously not from the South or Southeast, two regions where they would never call throwing burgers and hot dogs on directly over a blazing grill “barbecue.”
3. But there are six grilling techniques: direct, which is what we are the most used to, and is a lot like broiling; indirect, which is great for denser, bigger foods that take a long time to cook; rotisserie, which is great for even-browning and add smoke, which is a great technique for gas grills, which impart no aroma; barbecuing, usually with a pit smoker and an off-set firebox, whereby food cooks for a long time over a very low, highly-flavored heat; and cooking in the coals, in which you ditch the grill grate and do just what it sounds like.
4. When considering grill fuels, it’s good to know the pros and cons of each. Propane grills are the most popular in the U.S., but they have the aforementioned water content issues. Gas grills are also common, connected directly to the gas line of the house. (My parents, EMTs and my father the volunteer fireman would probably like to add that directly connected gas lines can be serious fire hazards.) Charcoal comes in two forms, briquettes and lump charcoal. Of the former, some are made with cheap scrap wood and all sorts of other fillers, not to mention borax as a binder. Lump charcoal is their preference, it has no additives and it burns much hotter. Wood produces some of the most incredible flavors, tastes that vary from wood to wood, however, fresh wood is 50% water, is harder to light and doesn’t burn easily. Seasoned wood actually burns hotter than lump charcoal.
5. Get this: Higher heat doesn’t make something cook faster. Why? Because conduction, one of the three types of heat transfers that occurs in grilling, isn’t very effective, and little can be done to speed up the process, as food isn’t much of a conductor. Raising the temperature just traps more heat, and makes the edges browner. However, convection, or circulated heat that works even better with a lid, creating an oven-like state, is more effective, as is radiation, which is heat that comes off the fire but never directly touches the food, such as the warmth that emanates from the sun. This is the part of a class that sounded the most like science lab because they started talking about the electromagnetic spectrum, thus I did what I always did then–zoned out and doodled. Look! I drew our teachers as grills!
Finally, and no, I am not just telling you this because my weekend was like, a sponsored promotion of this book, if you have any interest at all in cooking outside, you have got to buy Mastering the Grill. It is absolutely loaded (like, 400 pages stuffed) with mind-blowing amounts of building blocks and helpful tidbits, like those above, but ten thousand more.
Usually, when we read about grilling, it’s about barbecuing, or the culture around Southern and Southeastern grilling. But this is about the technique, science, and approaches to cooking with fire, which means that it is endless useful, whether you put peaches, Foccacia, brisket or corn on the grill. The book isn’t about regional sauces or techniques, but how to wield fire to your cooking advantage.
Also? In case the “Terrance and Phillip” doodles don’t give it away, the authors are pretty cute.
scooped-out pepper halvespepper stuffingfilling the pepperssmoke-roasting the stuffed peppers
One year ago: Chocolate Caramel Cheesecake
Smoke-Roasted Bell Peppers Stuffed With Garden Vegetables
Mastering the Grill by Andrew Schloss and David Joachim
Yes, I know: Where’s the beef? Well, after a weekend of burgers, chicken, sausage, and ribs I’m still in the land of Meat over and even the thought of it makes me groan a little. This, however, is something I can’t wait to make again, a lighter, crunchier and healthier variety of stuffed pepper and pretty as a picture.
Makes 8 small servings
2 medium red bell peppers
3 medium mixed bell peppers (orange, yellow, green)
3/4 teaspoon kosher salt
1/2 teaspoon ground black pepper
3 tablespoons butter
1 onion, finely chopped
2 cloves garlic, minced
1 medium zucchini, cut into 1/4-inch dice
1 medium yellow squash, cut into 1/4-inch dice
2 cups fresh or frozen corn kernels (from 3 to 4 ears of corn; for extra flavor, once you’ve cut the kernels off, use the dull side of your knife blade to scrape the remaining corn and juices, or “milk” from the cob)
1 medium tomato, seeded and cut into 1/4-inch dice
2 tablespoons chopped fresh herbs (such as parsley, oregano, basil or a mix)
1/4 cup plain dried breadcrumbs
Oil for coating grill grate
2 tablespoons grated Parmesan cheese (optional)
If using a gas grill: Use indirect heat on medium (325° to 350°F), a 2- to 4-burner grill-middle burner(s) off, or a 2-burner grill with 1 side off and a clean, oiled grate.
If using a charcoal grill: Indirect heat, medium ash, split charcoal bed (about 2 dozen coals per side) with a clean, oiled grate on medium setting
1. Heat the grill as directed. Soak 2 cups of apple or oak wood chips or chunks in water for one hour.
2. Seed, core and cut one of the red bell peppers into 1/4-inch dice. Cut the remaining bell peppers in half lengthwise right through the stem, leaving a bit of stem attached to each half. Cut out the cores, seeds, and ribs from the interiors of the peppers, leaving the stem intact. Sprinkle the insides of the peppers with 1/4 teaspoon of the salt and 1/4 teaspoon of the pepper.
3. Melt the butter in a large skillet over medium heat. Add the onion and saute until almost tender, about 4 minutes. Add the garlic, chopped bell pepper, zucchini and yellow squash. Saute the vegetables until crisp-tender, about 4 minutes. Stir in the corn and tomato and cook until heated through 1 to 2 minutes. Stir in herbs, breadcrumbs, and the remaining 1/2 teaspoon salt and 1/4 teaspoon pepper. Cook and stir until the breadcrumbs soak up most of the liquid in the pan. Remove from the heat and spoon the filling equally into the pepper cavities.
4. When the grill is hot, put the soaked wood chips or chunks over the coal on both sides of the grill. If using gas, put the wood chips in a smoker box or in a perforated foil packet directly over one of the heated burners.
5. Brush the grill grate and coat it with oil. Put the stuffed peppers over the unheated part of the grill, cover, and cook until just tender 20 to 30 minutes. If your grill has a temperature gauge, it should stay around 350ºF.
6. Remove the peppers to a large serving platter. Sprinkle with the Parmesan (if using) and serve.