Friday, 7 February 2020

A Complete Guide To Making Perfect Burgers At Home

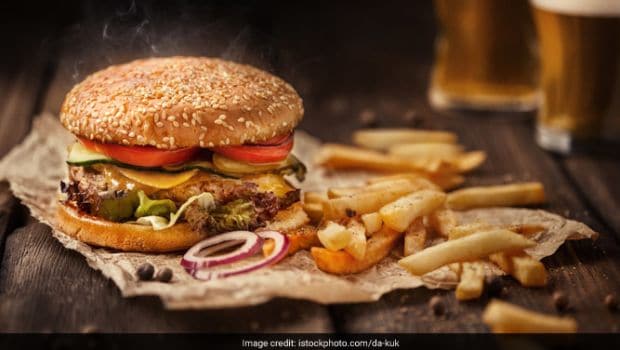
There's something vividly satisfying about taking a bite of the moist meat, the salty cheese, the soft white bun, and the crisp-as-a-wafer lettuce leaf of a burger. Here's how to make the perfect one at home!

A Complete Guide To Making Perfect Burgers At Home

When it comes to burgers, the world's your oyster; that's why you can make anything, from avocado and bacon burgers to potato tikki burgers. No matter which burger floats your boat though, there's something vividly satisfying about taking a bite of the moist meat, the salty cheese, the soft white bun, and the crisp-as-a-wafer lettuce leaf. One of North America's most famous exports to the world, its very first mention appeared on a Delmonico's menu in 1834, in New York. This wasn't quite the burger we know today, but something quite similar. It's a little hard to trace, but the rise of the burger appears to have happened simultaneously with the rise of the car-after all, the burger is quite easy to carry in one hand, while the other can stay on the wheel.
I'd like to preface this piece by noting that you can have your burgers any way you like. The burger is a blank canvas, for you to paint according to your likes and dislikes. Don't let anyone suggest that their way is the only way!
burger
Burger Patty
The burger patty is of course a crucial part of a burger. The classic American patty is made from beef, preferably ground fresh at home, then gently patted into shape and cooked. Just make sure to season it before serving, not before cooking, as the salt will leech the moisture from the meat, making it dry and inedible. But there are so many other options too; exceptional vegetable burgers, lamb or chicken burgers and of course, there's nothing quite like a crisp fish burger.
Burger Cheese

Cheese is an integral part of a burger. You are free to choose any cheese you like- a brie, for instance, would add creaminess to your burger, and goat's cheese would bring in a tang. Just make sure to pick a soft-ish cheese so that it can melt fully.
Burger Buns

I find the best burger buns are the classic pillowy burger buns; sometimes pocked with sesame seeds, sometimes not. Any other bun becomes almost too flavoursome, and takes away from the taste of the burger meat. Plus, it veers too much into sandwich territory!

Burger Condiments

When it comes to burger condiments, I'm a purist-I like pickles maybe, or caramelised onions. No tomatoes, because they make the burger bun too messy for me. But then again, my best friend always has bacon and a fried egg, and my mum goes for lettuce and tomato. There's no hard and fast rule!

Burger Sauces

A slew of sauces are available to us to slather over the burger bun-sweet ketchup, mayonnaise, smoky barbecue, special sauce (a blend of ketchup and mayonnaise), chilli sauce. It's one of the quickest ways to add flavour to your burger.

how to make burger

Constructing Your Burger

Reams and reams of text have been dedicated to the perfect architecture of a burger. There's a reason for this; lettuce is liable to wilt straightaway, tomato may drip all over the bread making it soggy, your condiments may all fall out the minute you bite into your burger. All this can be avoided by proper layering. Always start with a lightly grilled bun that has been smeared with mayo (or special sauce or whatever condiment). This will ensure that your veggies don't slide off. Then place your pickles (if using) on the bottom slice of bread, followed by your patty. Above the patty goes your melted cheese, then tomato, then your leaf of crisp lettuce, and finally your top bun, and you're all set!

Recipe For Chicken Burger Patty

Ingredients:

Milk - 50g

Breadcrumbs - 30g

Chicken, ground - 750g

Butter - 3 tbsp, melted until just malleable

Salt and pepper to season

Method:

1. Mix together the chicken, butter, milk and crumbs into a large bowl. It's preferable to use your hands for this, and to fiddle as little as possible with the meat.

2. Chill the mixture for about half an hour; this will help your patties to hold their shape. Then take them out of the chiller, and shape into four patties, as quickly as possible.

3. Cook them on a skillet with hot oil, turning every three minutes or so until they are cooked through. They are now ready to go on your burger buns.

Recipe For Veggie Burger Patty

meatless burgerAlways start constructing your burger with a lightly grilled bun
Ingredients:
Yellow onion - 1/2, medium sized

Raw beetroot - 1/2 cup, peeled and grated

Garlic cloves - 6, peeled and crushed

Lemon juice - 1/2 tbsp

Pumpkin seeds - 1/4 cup, toasted

Almonds - 1/2 cup, chopped

Chilli powder - 2 tsp

Black pepper powder - 2 tsp

Salt to taste

Rice - 2 cups cooked (these should be short grained rice)

Egg - 1

Oil to fry

Method:

1. Chop up the onion and sauté over a medium flame until it softens and caramelises. It will take about fifteen minutes. Add in the beets, almonds, garlic, chilli powder and pepper, and stir frequently, for about ten minutes.

2. Allow the mixture to cool. Now grind in a mixer with the lemon juice and seeds, until the consistency is chunky. Don't process it so much that the texture is lost. Empty the mixture out, then in the same mixer, blend together the egg and rice till a paste-like consistency is attained. Then mix everything in a large bowl, together with the onions.

3. Set aside to chill for half an hour. This will allow the patty mixture to firm up. Shape them lightly into four-five patties, and then cook them over a well-oiled skillet for about ten minutes, turning once. Once they have grown crusts on both sides, take them off the flame, slide into your burger buns and enjoy.
So the next time you think of making burgers at home, bring this handy guide to your rescue and get going!

Thursday, 6 February 2020

Homemade Baby Balm Skin Cream Recipe!

When I was pregnant with my first child, I was given literally 11 bottles of baby lotion by friends and relatives. The smell reminded me of my own childhood and I loved that it was a lotion specially formulated for baby. I figured all of the ingredients must be natural and safe since it was for babies after all… and then I actually read the ingredients.

What’s in Baby Lotion?

I wondered why things like propylene glycol, parabens, artificial fragrances, synthetic waxes, and petroleum-based oils were considered safe for children. Turns out, they aren’t considered safe for children and the products I’d been given had a hazard rating of 5-6 on the EWG website and had “moderate risk of allergies and immunotoxicity as well as reproductive and developmental toxins.
I definitely wasn’t going to put that on my baby, so I started looking for natural options. I found some great ones but also found out that most of them were pretty expensive.

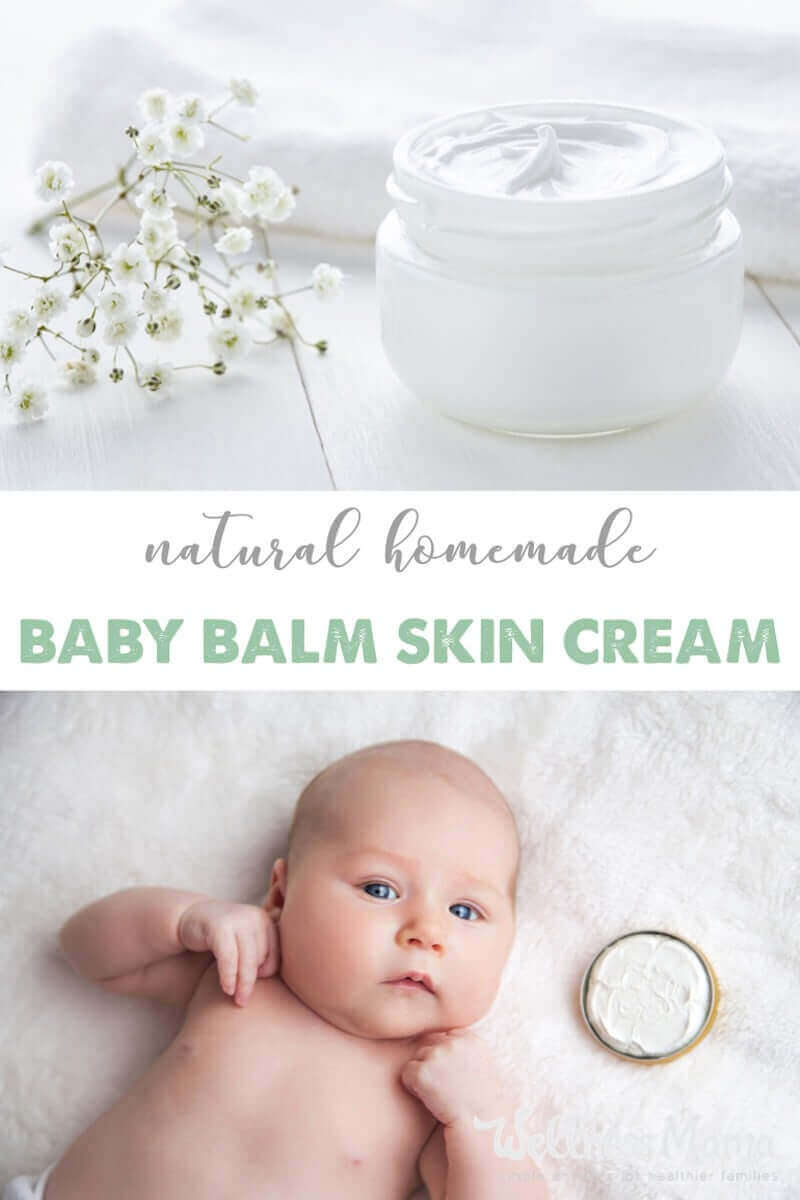
Baby Balm Skin Cream RecipeI decided to try to make my own from all-natural, food-safe ingredients and this ended up being less expensive for me anyway since I had many of these ingredients on hand for my homemade lotion bars and other homemade beauty products.

Choosing Natural Ingredients

Instead of propylene glycol, parabens and synthetic ingredients, I wanted to find all-natural ingredients to put on my baby’s skin and I wanted them to even be safe enough to eat!
I decided to use:
  • Cocoa Butter because it is naturally high in antioxidants and fatty acids that are moisturizing to the skin. (I ordered it here)
  • Shea Butter – Natural source of Vitamin A and other nutrients, shea butter is highly nourishing to the skin. (I used this raw, unrefined one)
  • Olive Oil– Moisturizing and skin protecting.
  • Castor Oil– Optional but high in ricinoleic acid and skin protective. (this is the one I use)
  • Essential Oils: I used Frankincense, Myrhh, Chamomile, and Rose and the scent was incredible. The Chamomile I used was blue chamomile, thus the blue/green tint in the picture above.
I loved that this recipe is completely oil-based with shelf-stable ingredients. Since no liquid is added, it has an indefinite shelf life and will last for months or years. It takes a few minutes to absorb into the skin and only a tiny bit is needed. I’ve had friends say that this was incredibly helpful for eczema and skin problems as well.

Baby Balm Ingredients

  • 1/4 cup cocoa butter (or 32 cocoa butter wafers)
  • 1/4 cup shea butter
  • 2 Tablespoons olive oil
  • 1 Tablespoon castor oil
  • Essential oils of choice. I used 15 drops each of Frankincense, Myrrh, Chamomile, and Rose.

Baby Balm Instructions

  1. Heat all ingredients (except essential oils) in a double boiler or in a glass jar or bowl over a small pan of boiling water.
  2. Stir carefully until melted.
  3. Remove from heat and add essential oils if using.
  4. Pour in to a glass jar for storage.
  5. Use a small amount as needed for baby’s skin (or adult skin)
What did you use on your little ones? Ever made your own? Share below!
This natural homemade baby balm combines skin nourishing cocoa butter, shea butter, olive oil and castor oil with essential oils for a baby safe lotion.

Wednesday, 5 February 2020

roasted stuffed bell peppers!


After Day One at the wineries and Days Two and Three at the grill, we spent our last day on a barely too brief to mention swing into San Francisco where we wandered the Ferry Market Building and lunched at the Slanted Door with friends before heading up to Berkeley. We had dinner with a gorgeous group of food bloggers that evening at Oliveto in Oakland, and on recommendation from the lovely Shuna, breakfast at Mama’s Royal the next morning. In between these gullet-gutting excursions, we found some time on Monday to wander about the Berkeley campus where we wallowed in nostalgia for our unscheduled college days and once wrinkle-free foreheads (fine, that was just me) before jetting back to the land of late dinners, humidity, and the daily grind.
But really–let’s cut to the chase already, shall we? After raking through my extensive notes from the weekend’s grilling class, it’s even clearer than before what a Grilling 101 it was, chock full of building blocks. The recipes, though, were anything but introductory and I’ve included one of my favorites at the end.
So, with little further ado, five totally nerdy bits of grilling information I learned this weekend:
1. Do you know why gas grills don’t sear as well as charcoal grills? To get a good sear, you need a raging hot fire and a dry surface. Charcoal burns drier than gas. Gas is about 30 percent moisture, releasing 1/2 to 1 cup water every 10 minutes that the grill is on. This water adds steam to the cooking process.
2. There are five ways only to cook with fire: Right in the fire, right near the fire (like toasting a marshmallow), directly over the fire, indirectly, with no heat directly underneath, and an oven set-up, where the walls are heated. [See Figure 1, brought to you by a one-hour delayed flight.] Indirect was totally new to me because I’m obviously not from the South or Southeast, two regions where they would never call throwing burgers and hot dogs on directly over a blazing grill “barbecue.”
3. But there are six grilling techniques: direct, which is what we are the most used to, and is a lot like broiling; indirect, which is great for denser, bigger foods that take a long time to cook; rotisserie, which is great for even-browning and add smoke, which is a great technique for gas grills, which impart no aroma; barbecuing, usually with a pit smoker and an off-set firebox, whereby food cooks for a long time over a very low, highly-flavored heat; and cooking in the coals, in which you ditch the grill grate and do just what it sounds like.
4. When considering grill fuels, it’s good to know the pros and cons of each. Propane grills are the most popular in the U.S., but they have the aforementioned water content issues. Gas grills are also common, connected directly to the gas line of the house. (My parents, EMTs and my father the volunteer fireman would probably like to add that directly connected gas lines can be serious fire hazards.) Charcoal comes in two forms, briquettes and lump charcoal. Of the former, some are made with cheap scrap wood and all sorts of other fillers, not to mention borax as a binder. Lump charcoal is their preference, it has no additives and it burns much hotter. Wood produces some of the most incredible flavors, tastes that vary from wood to wood, however, fresh wood is 50% water, is harder to light and doesn’t burn easily. Seasoned wood actually burns hotter than lump charcoal.
5. Get this: Higher heat doesn’t make something cook faster. Why? Because conduction, one of the three types of heat transfers that occurs in grilling, isn’t very effective, and little can be done to speed up the process, as food isn’t much of a conductor. Raising the temperature just traps more heat, and makes the edges browner. However, convection, or circulated heat that works even better with a lid, creating an oven-like state, is more effective, as is radiation, which is heat that comes off the fire but never directly touches the food, such as the warmth that emanates from the sun. This is the part of a class that sounded the most like science lab because they started talking about the electromagnetic spectrum, thus I did what I always did then–zoned out and doodled. Look! I drew our teachers as grills!
Finally, and no, I am not just telling you this because my weekend was like, a sponsored promotion of this book, if you have any interest at all in cooking outside, you have got to buy Mastering the Grill. It is absolutely loaded (like, 400 pages stuffed) with mind-blowing amounts of building blocks and helpful tidbits, like those above, but ten thousand more.
Usually, when we read about grilling, it’s about barbecuing, or the culture around Southern and Southeastern grilling. But this is about the technique, science, and approaches to cooking with fire, which means that it is endless useful, whether you put peaches, Foccacia, brisket or corn on the grill. The book isn’t about regional sauces or techniques, but how to wield fire to your cooking advantage.
Also? In case the “Terrance and Phillip” doodles don’t give it away, the authors are pretty cute.
scooped-out pepper halvespepper stuffingfilling the pepperssmoke-roasting the stuffed peppers
One year ago: Chocolate Caramel Cheesecake
Smoke-Roasted Bell Peppers Stuffed With Garden Vegetables
Mastering the Grill by Andrew Schloss and David Joachim
Yes, I know: Where’s the beef? Well, after a weekend of burgers, chicken, sausage, and ribs I’m still in the land of Meat over and even the thought of it makes me groan a little. This, however, is something I can’t wait to make again, a lighter, crunchier and healthier variety of stuffed pepper and pretty as a picture.
Makes 8 small servings
2 medium red bell peppers
3 medium mixed bell peppers (orange, yellow, green)
3/4 teaspoon kosher salt
1/2 teaspoon ground black pepper
3 tablespoons butter
1 onion, finely chopped
2 cloves garlic, minced
1 medium zucchini, cut into 1/4-inch dice
1 medium yellow squash, cut into 1/4-inch dice
2 cups fresh or frozen corn kernels (from 3 to 4 ears of corn; for extra flavor, once you’ve cut the kernels off, use the dull side of your knife blade to scrape the remaining corn and juices, or “milk” from the cob)
1 medium tomato, seeded and cut into 1/4-inch dice
2 tablespoons chopped fresh herbs (such as parsley, oregano, basil or a mix)
1/4 cup plain dried breadcrumbs
Oil for coating grill grate
2 tablespoons grated Parmesan cheese (optional)
If using a gas grill: Use indirect heat on medium (325° to 350°F), a 2- to 4-burner grill-middle burner(s) off, or a 2-burner grill with 1 side off and a clean, oiled grate.
If using a charcoal grill: Indirect heat, medium ash, split charcoal bed (about 2 dozen coals per side) with a clean, oiled grate on medium setting
1. Heat the grill as directed. Soak 2 cups of apple or oak wood chips or chunks in water for one hour.
2. Seed, core and cut one of the red bell peppers into 1/4-inch dice. Cut the remaining bell peppers in half lengthwise right through the stem, leaving a bit of stem attached to each half. Cut out the cores, seeds, and ribs from the interiors of the peppers, leaving the stem intact. Sprinkle the insides of the peppers with 1/4 teaspoon of the salt and 1/4 teaspoon of the pepper.
3. Melt the butter in a large skillet over medium heat. Add the onion and saute until almost tender, about 4 minutes. Add the garlic, chopped bell pepper, zucchini and yellow squash. Saute the vegetables until crisp-tender, about 4 minutes. Stir in the corn and tomato and cook until heated through 1 to 2 minutes. Stir in herbs, breadcrumbs, and the remaining 1/2 teaspoon salt and 1/4 teaspoon pepper. Cook and stir until the breadcrumbs soak up most of the liquid in the pan. Remove from the heat and spoon the filling equally into the pepper cavities.
4. When the grill is hot, put the soaked wood chips or chunks over the coal on both sides of the grill. If using gas, put the wood chips in a smoker box or in a perforated foil packet directly over one of the heated burners.
5. Brush the grill grate and coat it with oil. Put the stuffed peppers over the unheated part of the grill, cover, and cook until just tender 20 to 30 minutes. If your grill has a temperature gauge, it should stay around 350ºF.
6. Remove the peppers to a large serving platter. Sprinkle with the Parmesan (if using) and serve.

HOMEMADE MCDONALDS CRISPY VEGGIE BURGER!

Aloo tikki burger, mcdonalds, burger recipe, veggie burger recipe, mctikki burger recipe
If you are wondering why you have never heard of this burger before, thats because McDonalds serves localized burger in different countries based on regional flavors. MCAlooTikkis (Where aloo means potatoes) is a popular burger in India. Aloo tikki being a famous snack and a street food in India, Mcdonalds has created a fusion in a perfect east meets west style and ever since this item has surged in popularity among India crowd, one reason being, majority of Indians are vegetarians. Having said that, this time when I was in India I tried the KFC chicken with lemon seasoning. The slight tangy flavor will send your tastebuds craving for more.
We all understand that fast food is not a good option and its growing concerns of health. So here is an easy homemade version of the famous crispy aloo tikki burger or the Mcveggie burger. This recipe uses a portion of vegetables and potatoes and the outer crisp coating will remind you of the famous burger. This is ideally served with tomato mayo instead of the regular mayo. There are vegetarian mayo available with no eggs in it.
I fried half and coated the other half in batter and bread crumbs and popped it in the freezer. To freeze it well, line a sheet or a plate with plastic foil and place the coated patty on the sheet, keeping enough space so that they don’t touch. Once it hardens in an hour or two, remove and place it in freezer bags or freezer boxes. When ready to use, thaw in the refrigerator (If you transfer the burger from the freezer to the refrigerator at night, it should be ready for frying by morning). Alternately you can place in the counter to thaw for 30 minutes to an hour or thaw in the microwave for few seconds.Apply mayonese on the top side of the bread and place lettuce or cabbage in between as a moisture barrier or else it will make the burger soggy.
veggie burger recipeCook the vegetables in oil and butter till half done. Add salt and the spices. Sautee and then add the slightly mashed potatoes.

Aloo tikki burger, mcdonalds, burger recipe,  veggie burger recipe,  mctikki burger recipe
Mash the potatoes and the veggies with a potato masher or flat laddle. Taste and adjust the salt if needed.
Aloo tikki burger, mcdonalds, burger recipe,  veggie burger recipe,  mctikki burger recipe
Add the bread crumbs and mix well. Cover with a lid or plastic wrap and place in the refrigerator for 30 minutes to an hour.

best aloo tikki burger
Divide into 6 equal portions. Tightly roll each portion into a ball and flatten into a 1/2 inch patty. Dip in the batter and coat in bread crumbs.
Deep fry on medium high heat and fry till golden brown on both sides. I used only enough oil to submerge half of the patty. This is a good option if you don’t want to waste too much oil and if you don’t reuse oil.
For deep frying tips and the perfect temperatures for deep frying check this article on Food52.comMcDonalds Crispy Veggie burger
Prep Time
15 mins
Cook Time
20 mins
Total Time
30 mins
 
Refrigeration time : 30 minutes to 1 hour
Servings6 burgers
Ingredients
  • 2 Large potatoes boiled or baked (Yields 2 cups when roughly chopped)
  • 1/4 cup finely chopped onion
  • 1/4 cup carrots cut into small cubes or grated
  • 1/4 cup peas
  • 1/4 cup finely sliced green beans
  • 2 cloves of garlic minced or use 1/2 teaspoon garlic powder
  • 1 tablespoon oil
  • 2 tablespoons unsalted butter
  • 1/2 cup bread crumbs
SPICES
  • 1/4 teaspoon turmeric powder
  • 1/2 teaspoon cumin powder
  • 1 tablespoon dry cilantro or finely chopped
  • 1 teaspoon paprika / red chilly powder
  • 1 teaspoon chat masala
  • 1/2 teaspoon garlic powder if not using minced garlic
  • 1/2 teaspoon salt or to taste
FOR THE BATTER
  • 1/2 cup all purpose flour / maida
  • 5 tablespoons corn starch/corn flour
  • 1/4 cup corn meal / Makki ka Atta
  • 1/2 teaspoon salt
  • 1 cup cold water
  • 1/2 tablespoon oil
EXTRAS
  • Oil for frying
  • bread crumbs for coating
  • Dinner rolls
  • Mayo and lettuce chopped cabbage or similar
Instructions
  1. Add oil and butter in a pan and place on medium high heat. Add the minced garlic. Once it cooks add onions and the veggies. Sautee till the veggies are half cooked. Add the spices and mix well. Now add the mashed potatoes and incorporate everything well with a potato masher or flat paddle and mix for additional minute.
  2. Turn of the heat, transfer the potato mixture into a bowl and keep aside to cool. Add the bread crumbs and mix well almost like kneading. Cover the bowl with the lid or plastic wrap and place it in the refrigerator for 30 minutes to an hour so that it hardens a bit for easier handling.
To Prepare The Batter
  1. Mix all purpose flour + corn starch + corn meal + salt and mix well. Add water little at a time until a slightly thick batter is formed. Mix well and stir the oil in the batter. (Oil adds shine to the crumb coat)
Assembling and Frying:
  1. Roll the potatoes into balls and flatten it out into 1/2 inch thick patty. Carefully dip it in the batter and coat it with bread crumbs.
  2. Pour oil in a pan and place on medium heat. (I used oil only enough to submerge half of the patty. You can use more oil and deep fry). Test if the oil is hot enough by adding bread crumbs. If it sizzles, that means the oil is ready for frying. Add the burger. After 2-3 minutes turn the burger over. Fry on both sides till the burger is golden brown. Transfer to paper towel.
Assembling the Burger
  1. Cut a dinner roll into half. Place the burger on the lower bun/dinner roll. Spread some mayo on the upper side. Slide in lettuce or leaves so that it doesn't make the burger soggy.
Recipe Notes
To freeze: Line a sheet or a plate with plastic foil and place the coated patty on the sheet, keeping enough space so that they don't touch. Once it hardens in an hour or two, remove and place it in freezer bags or freezer boxes. When ready to use, thaw in the refrigerator (If you transfer the burger from the freezer to the refrigerator at night, it should be ready for frying by morning). Alternately you can place in the counter to thaw for 30 minutes to an hour or thaw in the microwave for few seconds.